Getting Started
Create a project, run your first scan, and understand how ScanlyApp turns crawl data into actionable QA reports.
Why it matters
First-run quality determines adoption.
If teams can create a project and read a report in minutes, onboarding becomes self-serve.
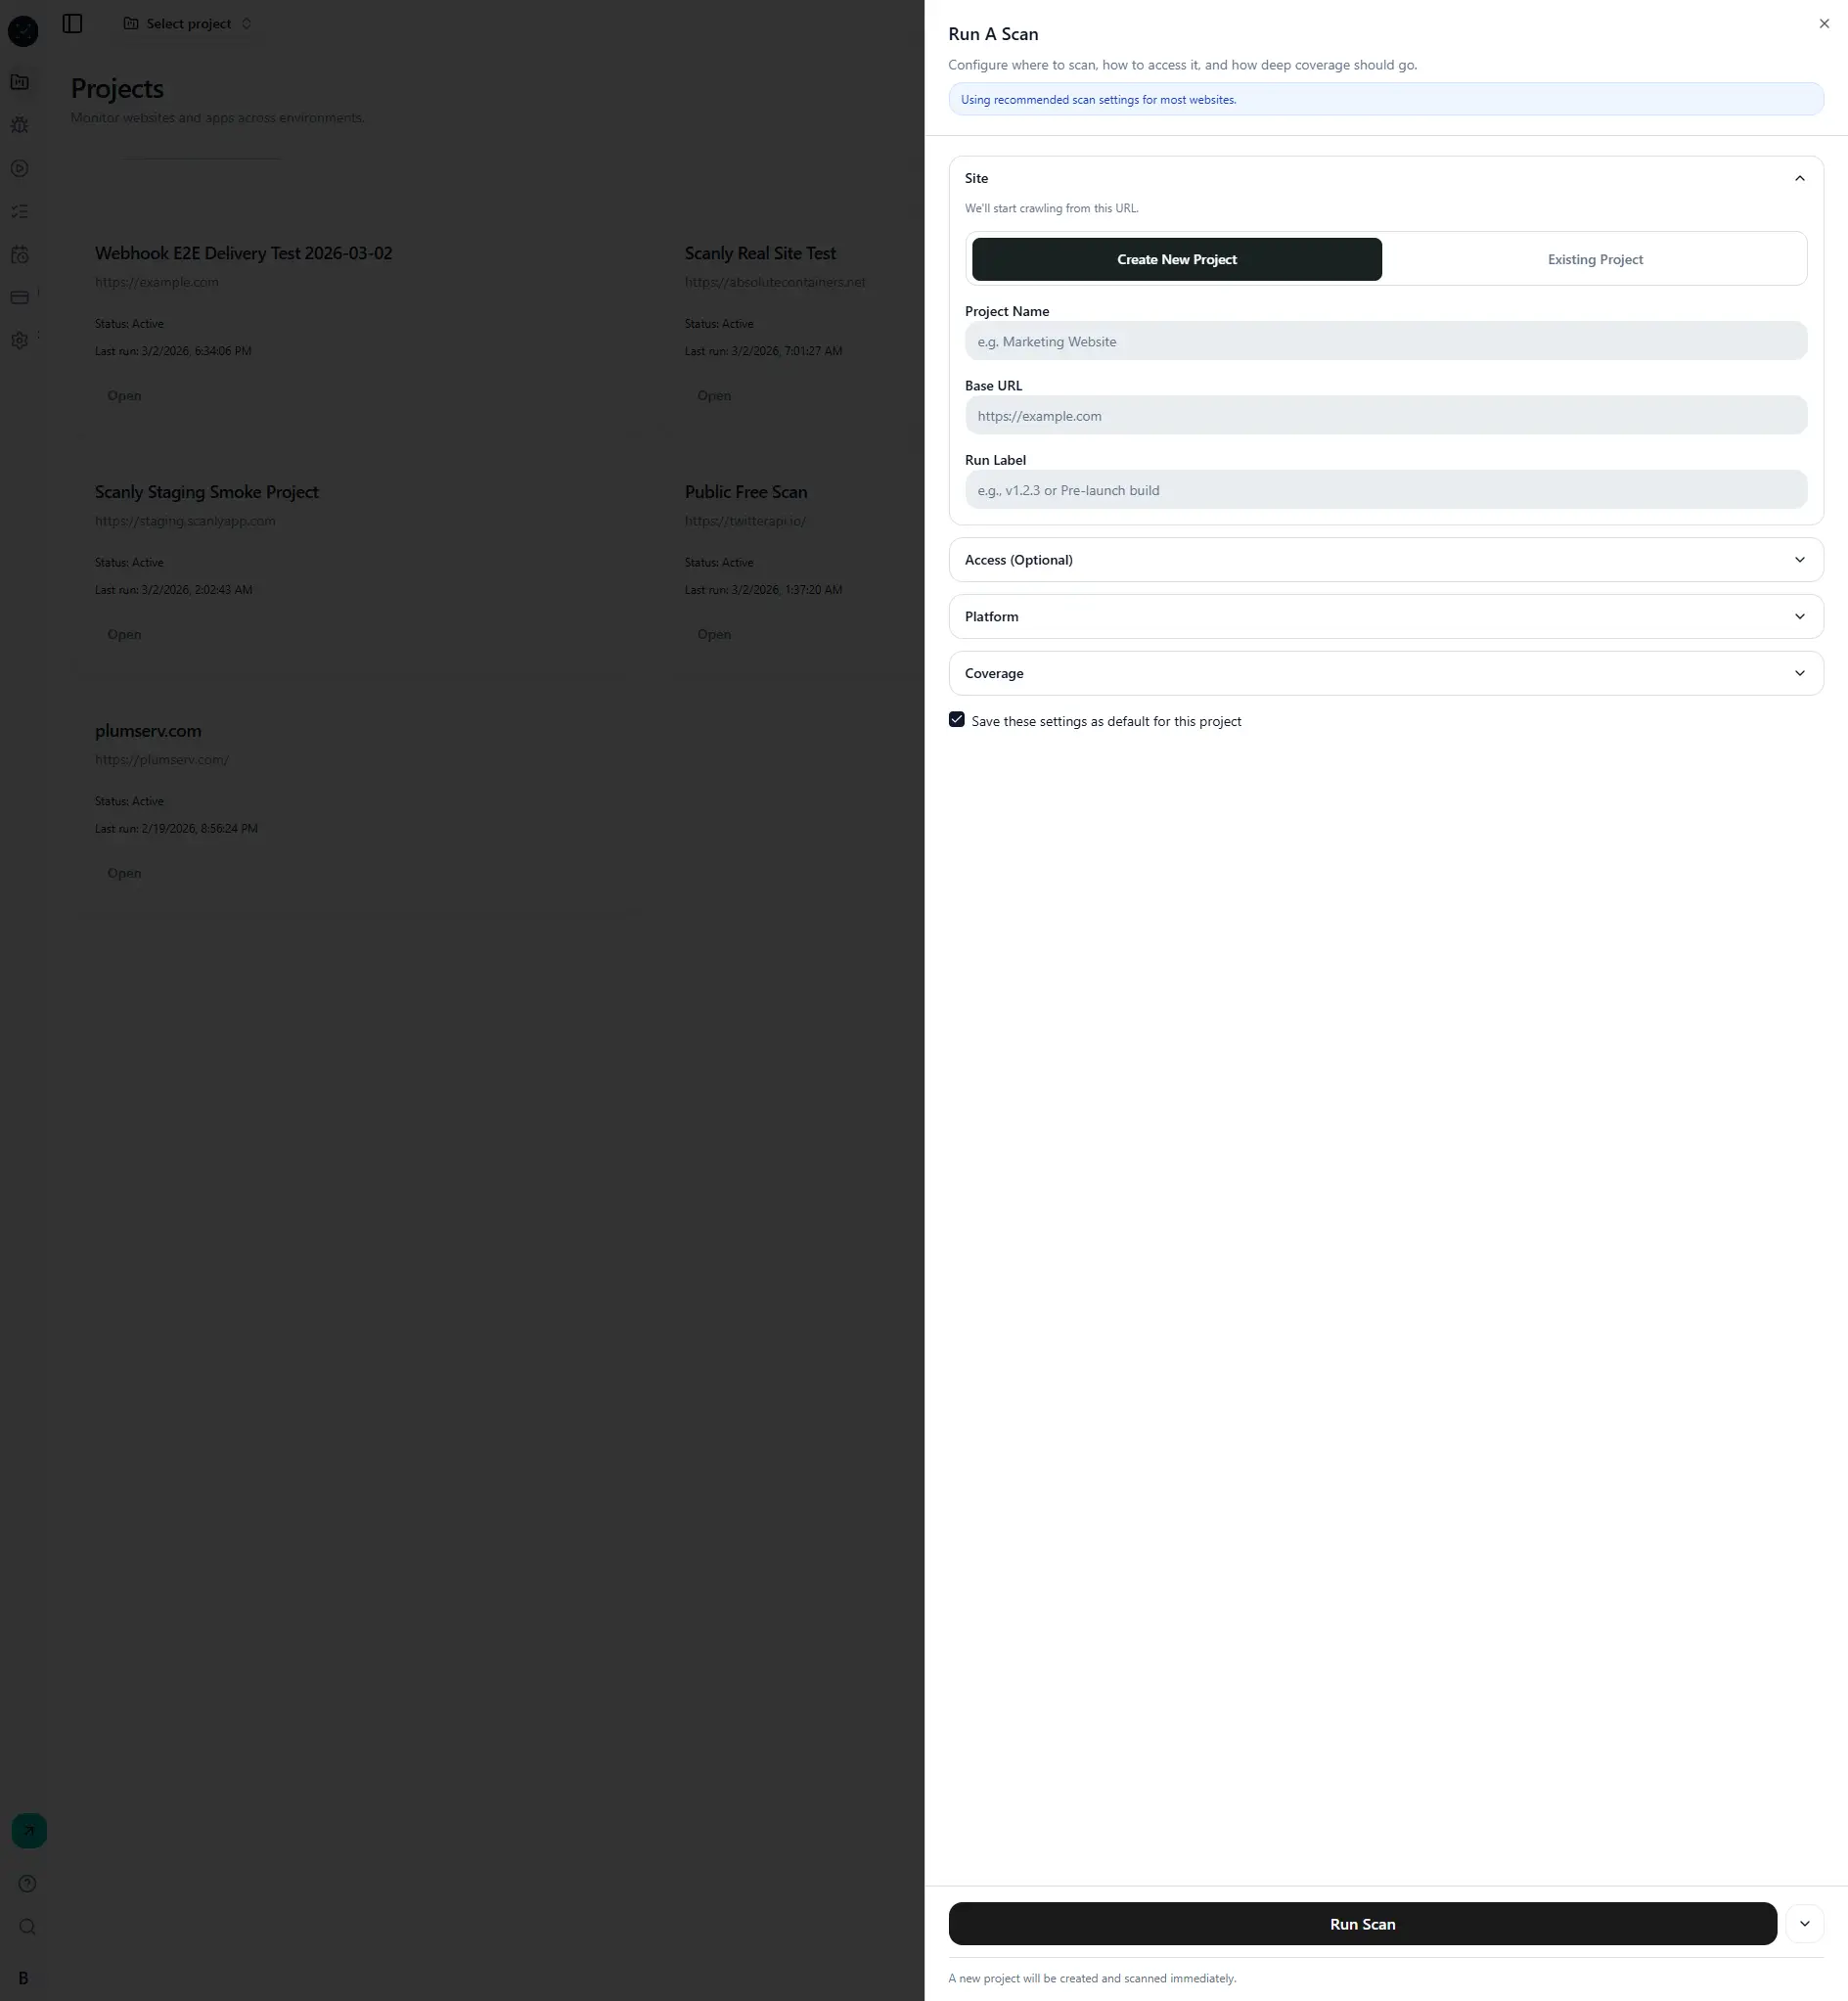
Step-by-step
- Sign in at
/loginor create an account at/signup. - Open Dashboard -> Projects.
- Click New Scan.
- In the Site step, enter project URL and run label.
- Keep default coverage for first validation run.
- Start scan and wait for status to move from
queued/runningtopassed/failed. - Open the run to review summary, issues, and trace replay.
What happens behind the scenes
- API validates the request and creates a
run. - Queue enqueues a scan job.
- Worker executes Playwright crawl and checks.
- Artifacts and metrics are stored and rendered in run details.
Visual reference
Common mistakes
- Using a URL blocked by auth without configuring access.
- Selecting too much coverage on first run.
- Expecting full-scan completion instantly on large sites.